The images in this pictorial are for a DR650 Race Tech Rear shock, but the principles apply to many rear shock installations

The first thing you need to do before you start your rebuild is to go to the Race Tech website and get your valving information. On the first page of the installation instructions is a code that you will need to enter on their website, keep this handy as you go to their website. This will give you access to their information database and will provide you with a custom recipe for the valving of your shock. Once on the Race Tech site, click on 'SEARCH' (the left most link on the main menu), then click on 'DVS Valving Search'.
Fill in your information boxes and then under 'Digital Valving Search Access Codes' there are two boxes, one for the 'Front Valving Access Code' and one for 'Rear Valving Access Code'. Of course enter your code for the 'Rear Valving Access Code'.
The online calculator will give you your custom valving setup in the form of letter/number codes. For example, our results called for a CL9 low-speed compression stack, a CH1 high-speed compression stack, a RL6 low-speed rebound stack and a RH4 high-speed rebound stack. They also informed us that we needed a 1.9 mm (or #48 drill bit - 0.076") for the bleed hole. PRINT THESE RESULTS NOW! The access code is only good for 5 minutes!
Once you have your custom recipe in hand, head to the garage or shop area.
Remove the shock from the bike. Clean it thoroughly so no foreign particles find their way into the shock at any time. Then measure and record the length of the spring. This will allow you to reinstall the spring close to the original sag. As long as you are using the same spring. If you are not using the same spring, then you will pretty much have to start from scratch when we get there.
Disassemble shock
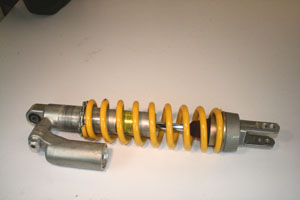
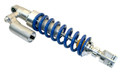
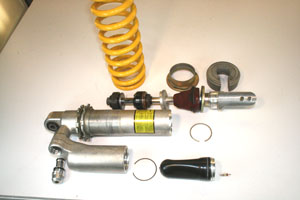
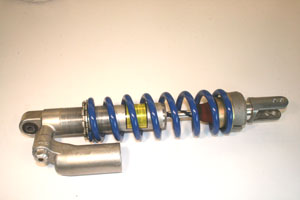
Above you see our thoroughly cleaned and freshened shock ready for disassembly.
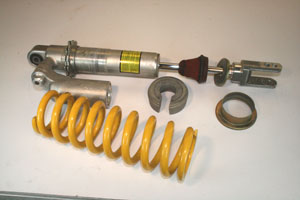
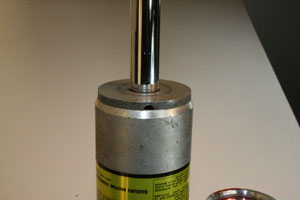
Back the spring preload nuts all the way out and then remove the cast aluminum collar, the steel spring seat and the spring. Should look like the above image when you have that done.
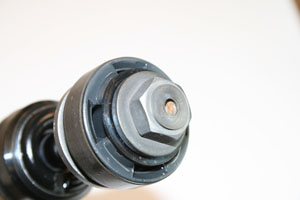
Release the nitrogen in the reservoir by pressing the center pin of the schrader valve. Once the pressure is gone, or very, very low, go ahead and remove the valve core.

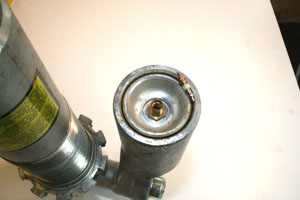
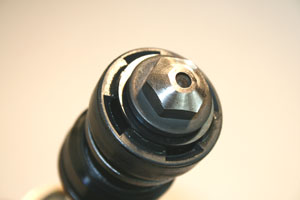
Press or tap the reservoir cap down to expose the wire retaining ring. Remove the retaining ring (tip; push the ring down to get it out of it's groove, then pull it out.)
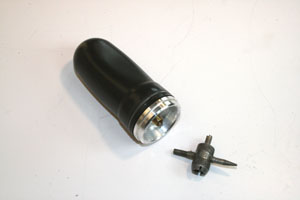
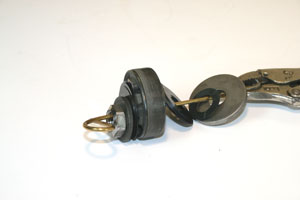
Now remove the bladder completely. I used a valve stem tool to get a firm enough grip to pull it out. Above is the bladder removed from the shock and the valve stem tool I used to pull it out with.
The next step is to remove the end cap of the shock itself. Tap it off evenly using a small drift against the cutouts. This cap is NOT threaded. Just lightly tap it up and out working your way from side to side.
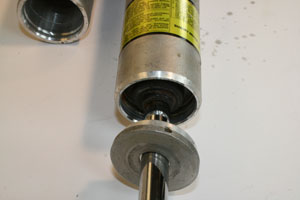
Remove the seal head. Like the bladder cap, it is easier to depress the seal head to expose the retaining ring. Remove the ring and slide out the shaft assembly. If the shaft assembly does not come out easily, you may
need to slide the shock bumper down out of the way and tap up against the washer against the end of the shock to remove it from the body.
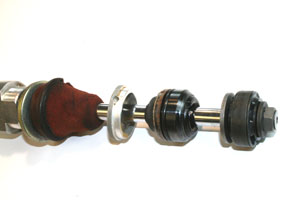
Pour the old fluid out of the shock and clean everything in solvent or kerosene (not gasoline!) and then hot soapy water. The image above shows what your parts should look like when you are completed cleaning them.
If you are installing a new Shock Shaft Assembly from either Cogent or Race Tech, skip to "Installing a new Shock Shaft Assembly".
Rebuild shock valving
Next we need to remove the nut from the end of the shaft, but to do that you must first carefully grind off just enough to remove the peened edge of the shaft that secures the nut. Read the warnings in the Race Tech instructions! Remove the nut from the end of the shaft and disassemble the valving stack.
Use a bolt or wire to keep all the valve shims in the same orientation and order as they came off the shaft, as we did in the image above.
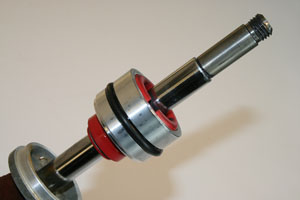
Remove the old seal head and clean the shaft. Check for wear, scores, dings or burrs. Lube the inside of the seal head and the shock shaft. Carefully slide the seal head onto the shaft.
Build the compression valving stack according to your valving results and the Race Tech instructions. Slide the compression base plate and the shims onto the shaft.
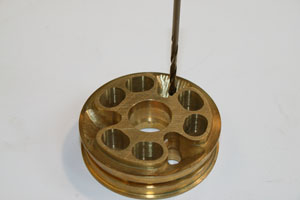
Drill the bleed hole. Race Tech calls for a 1.9 mm (0.076") hole. Use a #48 drill bit. If number drills are not available, a 5/64" drill is only slightly larger at 0.078".
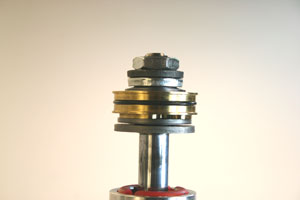
Install the valve body and complete the shim stacks. I had to use an extra washer (provided) so the nut would clamp the shims and not bottom out on the shaft shoulder.
Installing a new Shock Shaft Assembly
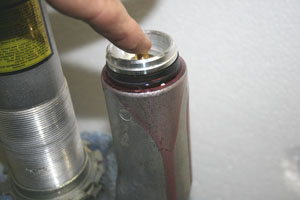
Clamp the shock body in a vise, install the compression adjuster and partially fill the reservoir with light (3w) shock fluid. Slide the bladder into the reservoir. You want some fluid to overflow to guarantee there is no air trapped in the reservoir. Push the bladder down far enough to install the retaining ring and then pull the bladder cap up to seat against the ring.

Fill the shock body nearly to the top, wrap the Teflon seal (not pictured) around the valve bodyand slide the shaft assembly into the shock body. Work it up and down to bleed out any air bubbles. With the shaft near full extension push the seal head into the shock body. Again, you want fluid to overflow to be sure no air is trapped in the shock. Push the seal head down into the shock body and install the retaining ring then tap the cap in place over the seal head. You can use some compressed air in the bladder to make sure the bladder cap and seal head are firmly seated against their retaining rings.
Install the spring, spring seat and aluminum collar. If you are installing the same spring turn the spring preload adjusters down until your spring length matches the measurement you made at the start. If you are installing a new spring set it about 1/2" to 3/4" longer and set the sag after installation. Bleed the air out of the bladder and refill with 175 psi of nitrogen. OK, so you will probably have to take your shock down to your local bike shop to have it filled with nitrogen. Call before you go to make sure they can do it though. Image above shows the shock all rebuilt and pretty!
Now, install the shock on your bike and check the sag. With you, wearing all your usual riding gear, sitting on the bike, your sag should be approximately 1/3 of your available travel. In the stock configuration, there is 260 mm or 10.2" of travel. If you have opted for the reduced travel version, you have 220 mm or 8.6" available. If you have installed lowering links, your travel has not actually been reduced at all.
For long travel, you want approximately 3.4" or 87 mm of sag. If you have the lowered, reduced travel option, you want to set your sag at 2.85" or 73 mm.
Once your sag is properly set, go for a ride and see how you like it!