

Loosening of the NSU screws is a well known and well documented problem.
The root cause is that the screws are tightened against the plastic body of the switch.
The plastic shrinks or deforms slightly from the hot engine oil. The screws loosen.
If not addressed they can fall out into the motor. That could get ugly real fast!
ProCycle offers a safety wire kit that is a permanent solution for this issue.
We find that many riders are intimidated when it comes to removing the clutch so here's a little pictorial to explain how simple this fix really is.
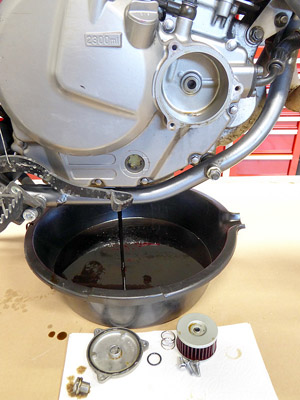
First remove the oil filter and drain the oil.
Remove the rtight foot peg and the brake pedal. The cotter pin on the back of the pedal pivot can be tough to get out.
This might be the most difficult step in the whole process.
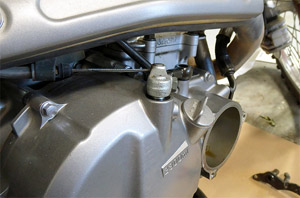
Remove the oil cooler line from the front of the side case (don't lose the o-ring).
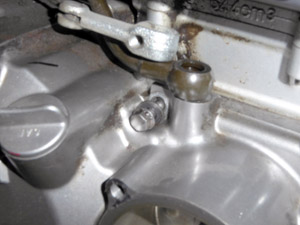
Remove the oil feed line at the top of the side case (don't lose the two sealing washers).
Note the position of the clutch arm. If necessary, mark the position on the case so you can put it back the same way when you put it together.
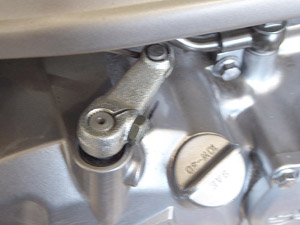
Remove the clutch arm from the shaft. You can leave it attached to the cable.
Remove all the case screws and pull the side case off of the engine. Note there is one screw below the oil feed line that has a sealing washer.
This has to go back in the same place to avoid an oil leak.
If you're very lucky the gasket will come off in one piece with the cover!
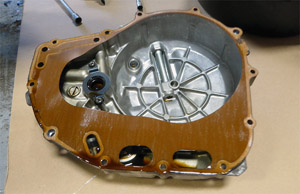
If you're not lucky you have some gasket cleaning and scraping to do. Suzuki gaskets are extremely stubborn.
We like Permatex gasket remover to help the process along. Available on our website.
It is also available at most auto parts stores.
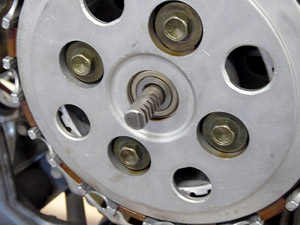
Remove the 4 bolts holding the clutch springs. Unscrew each bolt a couple turns at a time keeping them even.
If you don't keep them even you risk breaking a spring tower off the pressure plate.
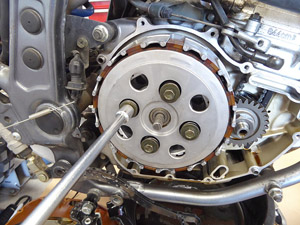
Remove the springs, pressure plate, and clutch plates.
Straighten out the lock tab on the lock washer.
Put the bike in 5th gear. You may have to spin the clutch hub to get it to shift. Temporarily reinstall the brake pedal.
Using a 27 millimeter (or 1-1/16") socket and breaker bar loosen the nut while holding firmly down on the brake pedal.
Remove the nut, spring washer and lock washer.
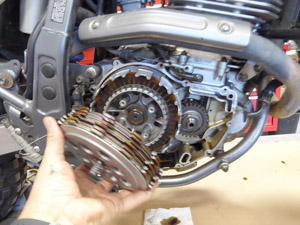
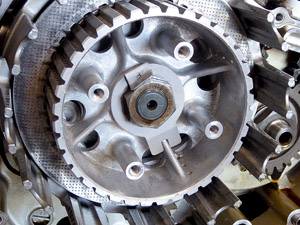
Remove the clutch hub and clutch basket. They will slide right off the shaft.
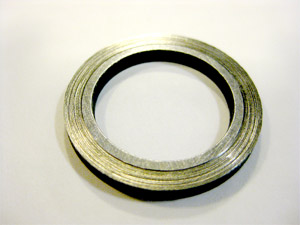
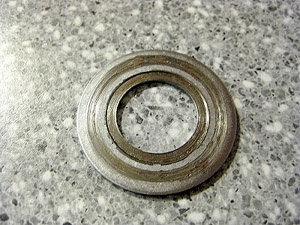
Note that there is a thrust washer between the hub and basket and another smaller thrust washer behind the basket.
Now is the perfect time to inspect the thrust washers. This is a common wear point on DR650s.
If the thrust washers are worn it will cause the clutch to drag when the lever is pulled in and the bike is in gear.
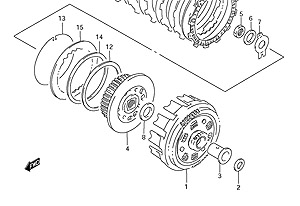
It can be hard to shift or find neutral. Here's some pics of worn thrust washers and a worn bushing.These items are #2, #3 and #8 in the diagram.

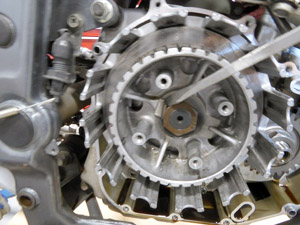
Remove the screws on the neutral sending unit and replace them with the drilled screws from the kit.
Do these screws one at a time.
There's no reason to remove the sending unit and if you do you risk a spring and a plunger falling out and dropping into your crankcase.
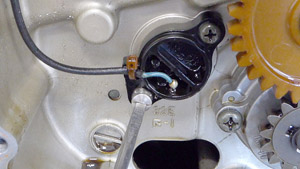
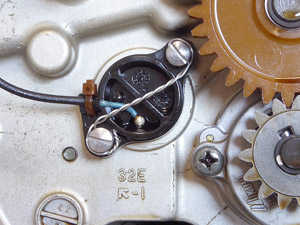
Take a short length of wire and run it through one of the screws. Looping around the head in a clockwise direction.
Twist up just enough wire to reach to the other screw head.
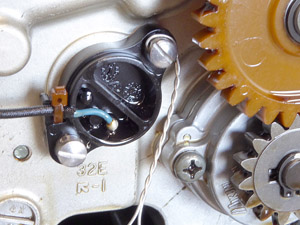
Run the wire through the other screw head so that it is pulling that screw in a clockwise (tightening) direction.
Twist a short length of the remaining wire then cut it off. Tuck the short tail up where it won't vibrate.
Okay, we're done! Now things just go back together in the reverse order. I won't document every step but I'll note some of the important points of the reassembly.
When you're putting the clutch basket back on be careful to make sure that it engages properly with the brown plastic oil pump idler gear.
If it doesn't mesh with the gear the basket won't slide all the way into place. When you tighten the nut you will break the gear.
If you damage the gear you won't have any oil pressure and your motor will die a quick death.
When you put the clutch plates back in start with one friction plate against the steel plate that is captive in clutch hub.
Alternate a steel plate and then a friction plate until all are installed. The last one should be a friction plate.
This is a good opportunity to inspect the clutch plates. Inspect each steel plates looking for hot spots, discoloration, warping or wear.
The steel plates have a rounded edge side and a sharp edge side. Put them in all facing the same direction.
Install a new lock tab washer and the spring washer.
Torque the center nut 36 lb/ft. Fold the lock tab to secure the nut in place.
When you're reinstalling the pressure plate make sure it fits all the way on to the large splines on the clutch hub.
Install the clutch springs and screws evenly just like they came out. Keeping the spring pressure equal between all four springs.
Make sure the teeth on the clutch release shaft are facing forward.
Coat the face of the gasket with grease. This will help it come off the engine cleanly next time the clutch is serviced.
Slide the side case into place. You may have to twist the clutch shaft at the top of the case to get it to engage properly with the spline.
Snug up the case screws. Twist the spline shaft counterclockwise pull the clutch arm tight against the cable and slide the arm onto the shaft.
It should be aligned with your original observation or mark from the beginning.
Clean and grease the brake pedal pivot before you put it back in the frame.
This whole process only took about 90 minutes and that includes me stopping to take pictures and make notes about how to write this up.